
This month’s updates are all about removing friction from everyday workflows.
In Helpdesk, you can now customise your GenAI responses to your business voice, build smarter Triggers with more condition options and translate replies back into the vendor’s original language when you’re working on multilingual tickets.
In Statements, ownership is now clearer with reconciliations from Helpdesk assigned to the same user as the ticket owner. Vendor selection is now easier when you’ve got duplicated vendors across multiple systems.
Helpdesk
1. Customise your GenAI responses
Our GenAI responses are guided by prompts. Think of prompts as the instructions that tell the AI how to write and what to include.
Now, Helpdesk Admins can view these instructions directly in-app, so it’s clear why the AI is replying the way it is.
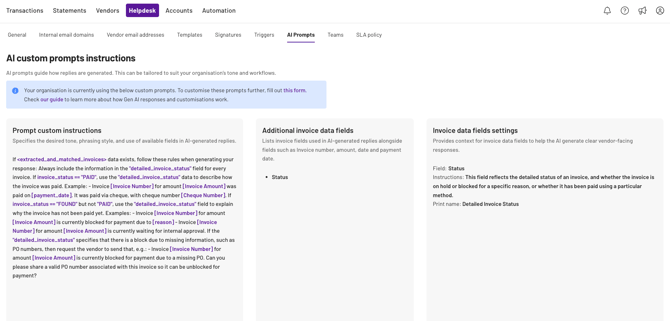
There are two parts:
-
General Prompt: The overall guidance, like tone of voice and writing style
A General Prompt might tell the AI to keep replies short, friendly-professional and jargon-free e.g. acknowledge the vendor's message, state next steps and ask if anything is missing.
-
Field Prompt: Extra guidance on specific invoice fields, like what they mean and how to explain them in replies
A Field Prompt might tell the AI to include the invoice status and explain how to describe different situations.
For example, if an invoice status is PAID, use the detailed status to explain payment method: "Invoice [Invoice number] for [Invoice amount] was paid on [payment date] via cheque, number [Cheque number]."
How to configure custom prompts:
From Settings → Helpdesk → AI Prompts, admins can raise a Xelix Support ticket using the link at the top of the page. Alternatively, you can connect with your dedicated Account Manager.
💡 Note: Viewing prompts and requesting updates are only available to Helpdesk Admin users
How it works
Step 1: Go to Settings → Helpdesk → AI Prompts
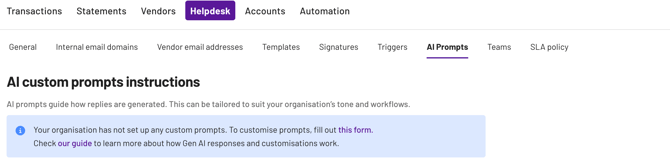
Step 2: Review the General Prompt and Field Prompt (read-only)
Step 3: Select Request update to raise a Support ticket with details of what you want to change
The goal?
→ Build confidence in AI responses by making instructions transparent
→ Reduce manual edits caused by misaligned tone or wording
→ Create a clear, auditable way to request prompt changes with the right context
2. Advanced trigger operators
Triggers are the rules that power Helpdesk automations, so you spend less time on manual triage.
This month, we’ve added more condition operators inside trigger conditions, including negative logic. That means you can build “everything except X” rules directly, without duplicating triggers.
New condition operators
- is not: exact non-match
- does not contain: the field doesn’t include the text you type
- is one of: matches any value from a list
- is not one of: excludes any value in a list
- is all of: matches all values in a list (useful for multi-select fields)
- is not all of: excludes values that match the full set (useful for multi-select fields)
Here are some examples of triggers you can create with new condition operators
- Auto-route everything except the Reminder category
- Run a trigger for any of AP, Finance, or AR mailboxes
- Skip processing if vendor group is not Priority Vendors
- Route tickets that contain “urgent”, but do not contain “low priority”
How it works
Step 1: Go to Helpdesk → Triggers and edit (or create) a trigger
Step 2: Add or update a condition (e.g. Category, Mailbox, Email Sender)
Step 3: Select the operator you need, such as is any of, is not, or does not contain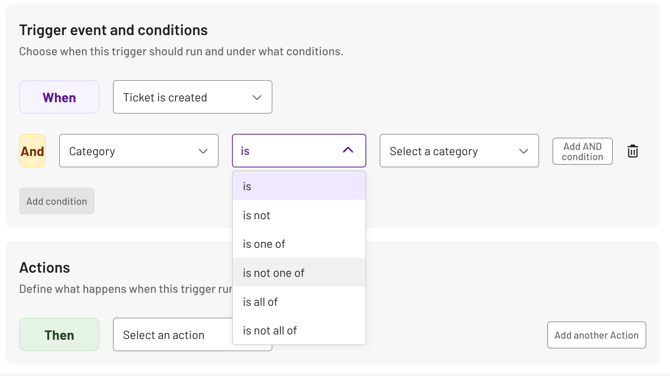
The goal?
→ Build complex automation logic without creating duplicate triggers
→ Express negative conditions (everything except X)
→ Match multi-select fields (any of these mailboxes, or all of these categories)
3. Smart reply language suggestions
When you translate a vendor message, it’s easy to forget to switch your reply back into the original language.
Now, Helpdesk gives you a language suggestion when you’re replying to a translated message.
You’ll see a banner above the message composer asking if you want to translate your reply back to the original language.
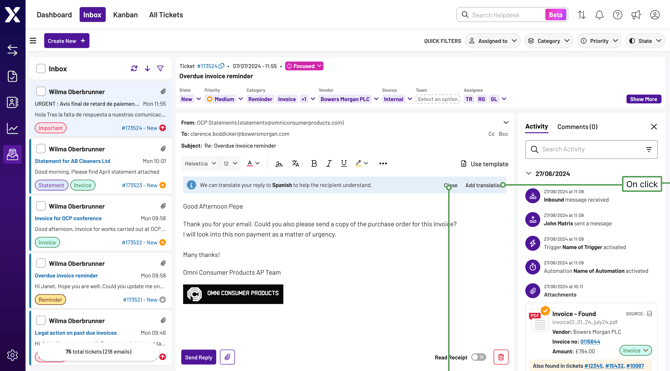
How it works
Step 1: Translate an inbound message
Step 2: Click Reply
Step 3: In the banner, select Add translation to translate your reply into the original language, or Ignore to keep replying in English
💡Note: The banner only appears when Helpdesk can detect a single source language. If the message includes multiple languages, or wasn’t translated, you won’t see the suggestion.
The goal?
→ Speed up multilingual reply workflows
→ Reduce manual translation steps and mistakes
→ Keep you in control (nothing is auto-translated)
Statements
1. Auto-assigned user between Helpdesk tickets and reconciliations
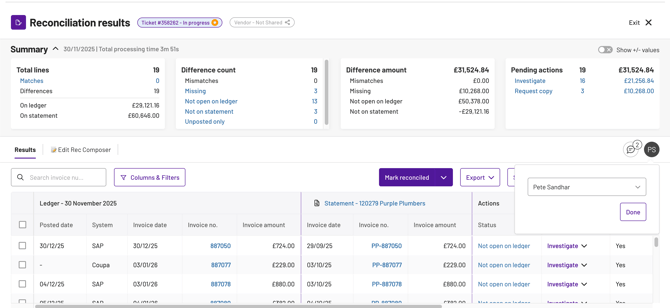
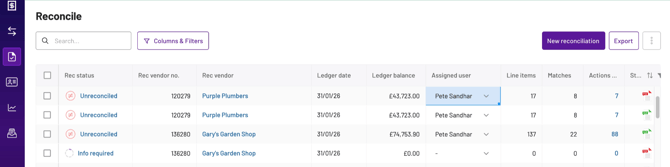
When a Helpdesk ticket is classified as a Statement, we’ll automatically assign the linked Reconciliation to the ticket’s first assignee.
💡Note: This applies to new or newly reclassified items going forward. It won’t override your existing auto-assignment rules or manual overrides.
How it works
Step 1: A Helpdesk ticket is classified as Statement (or reclassified to Statement)
Step 2: The Helpdesk ticket is assigned to a user
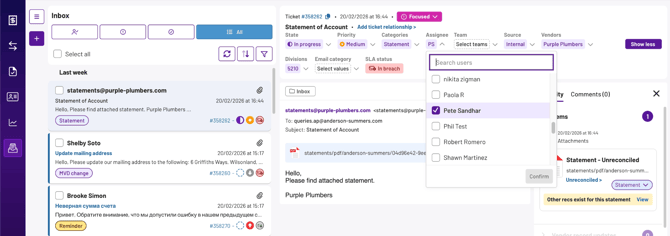
Step 3: The linked reconciliation is assigned to the same user
The goal?
→ Keep ticket and Reconciliation ownership in sync
→ Reduce double work and reassignments
→ Give you one clear owner for Statement workflows
2. Select correct vendors by system
If you’re using multiple ERPs (or migrating from one ERP to another), you can end up with vendors that look identical.
The same vendor name and code can appear more than once, and it isn’t always clear which one belongs to which system.
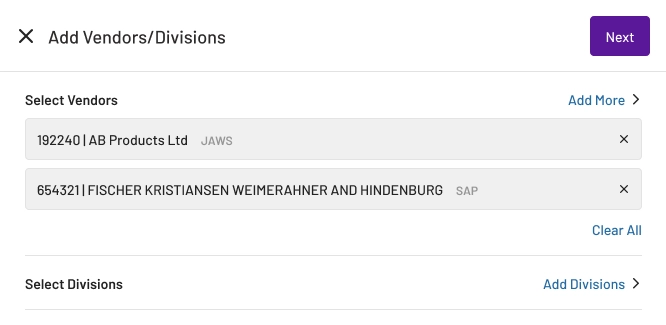
Now, we show the System next to each vendor in the Rec Composer vendor drawer, so it’s easier to select the right vendor first time.
How it works
Step 1: In Rec Composer, open the vendor drawer
Step 2: Review the System label next to each vendor
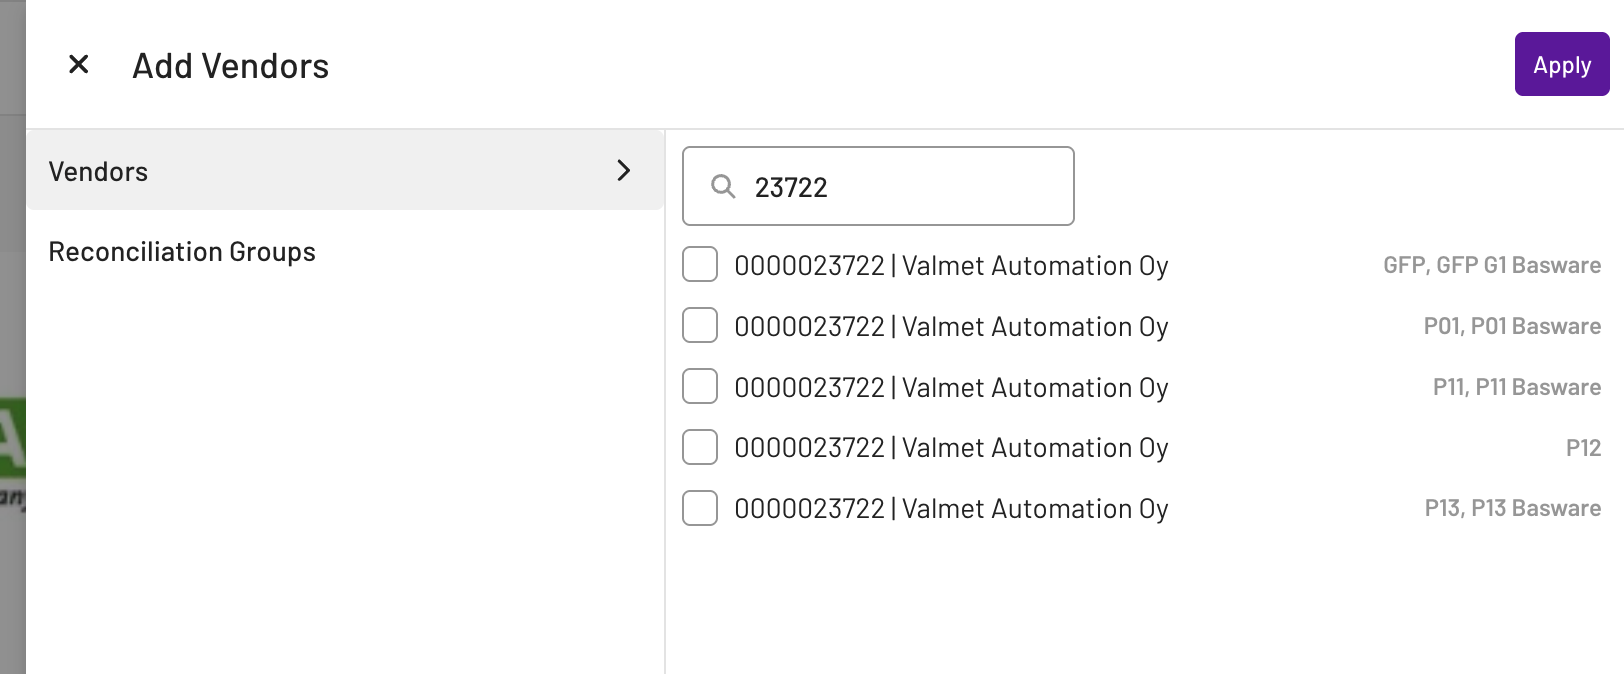
Step 3: Select the vendor linked to the right ERP or workflow system
The goal?
→ Reduce wrong-vendor selection when vendors are duplicated across systems
→ Improve vendor mapping consistency and automation rates
→ Avoid getting stuck at ledger date