
This guide explains how to manually upload a statement using Rec Composer on Statements. Rec Composer is our upgraded reconciliation workflow, designed to be faster and more streamlined so that you can view and edit all the rec info on a single page. We break down all the steps involved in this workflow, highlighting all the features you can use to upgrade your reconciliation experience ✨
- Upload a statement
- Vendor identification
- Invoice selection
- Ledger date selection
- Mapping columns
- Currency
- Check rows
- Reconcile zero-balance statement
When you're on the Reconcile tab, on the top right of the reconciliation table, click ‘Start New Reconciliation’
You will see a 7-step page of how to manually upload a statement and set metrics for a reconciliation.
Xelix automatically completes the 7 steps for you, however you can manually edit selections as you wish. This step-by-step process will explain how Xelix processes a reconciliation and where manual input can take place.
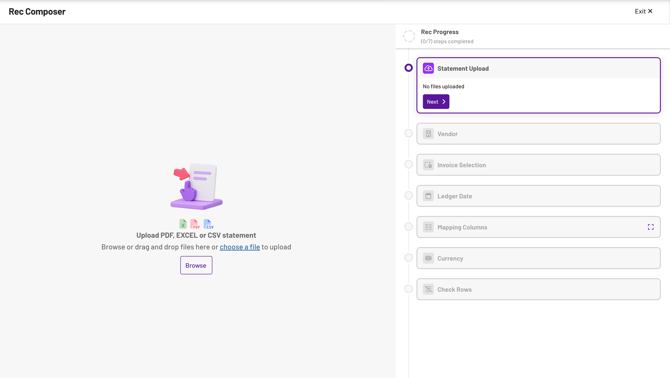
1.1. Step 1: Upload a statement
You can browse your computer or drag and drop one or multiple statements in the following formats:
- xml
- csv
- tsv
- xls
- xlsx
- xlsm
- ods
- xlsb
- pdf
💡 Note: of all these formats, we can read multiple pdf’s and Excel’s in this step, allowing you to upload multiple statements in these formats here.

💡 Note: if your statement was pulled from your inbox, the ticket number will show in the header . If you have duplicate statements coming in from two different tickets, the system is intelligent enough to queue the reconciliation only once.
Once complete, click the ‘Next’ button in purple.
1.2. Step 2: Vendor identification
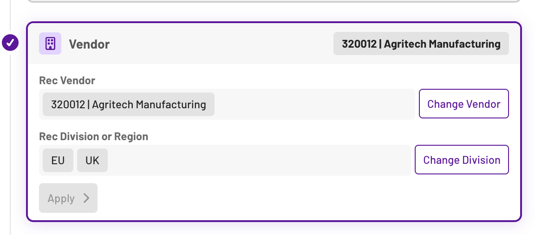
Usually, Xelix will automatically identify the Rec Vendor — for example, by recognising the logo on the statement. This works across various formats and layouts.
Xelix also automatically selects the Rec Group when the selected vendors match a group, and it will assign a Rec Division or Region based on available data.
However, you can manually perform these steps if needed.
To modify any selection:
- Click ‘Change vendor’ or ‘Change division’ to update vendors or divisions
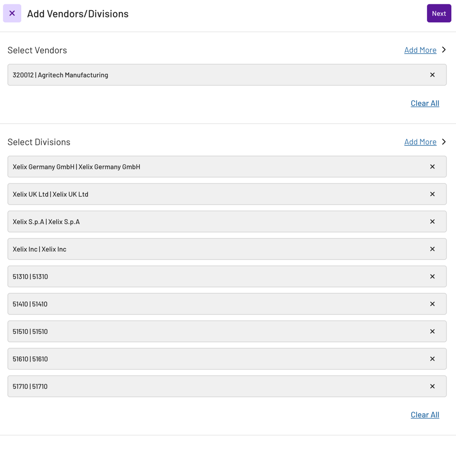
- Then, click the ‘Add more’ hyperlink to select additional vendors and/or divisions
- To modify Rec Groups, click ‘Add more vendors’ to access reconciliation groups set up in your settings
- To change Regions, click ‘Add more divisions’
After selecting the appropriate Rec Vendor, Group, Division, and Region, click ‘Apply’ (top left) to confirm these settings for this statement.
💡 Note: The available selections for Rec Vendors, Divisions, and Regions depend on the data we receive from your daily files (e.g. we may only identify "UK" and "EU" regions if those are the only ones present in your data).
1.3. Step 3: Invoice selection
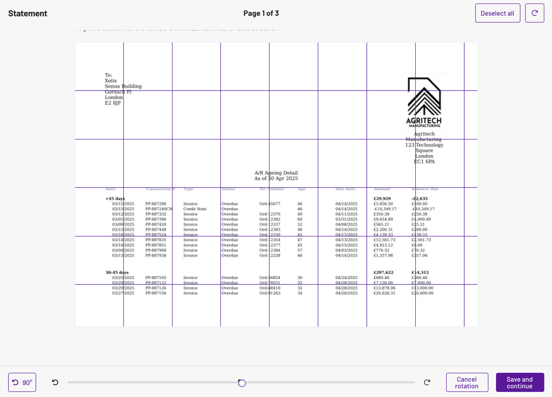
Xelix automatically maps the data set from the uploaded statement and identifies the rows selected.
You can adjust the selected rows by expanding or minimising the blue textbox.
You can deselect the selected invoice by clicking on the ‘deselect all’ button on the top right.
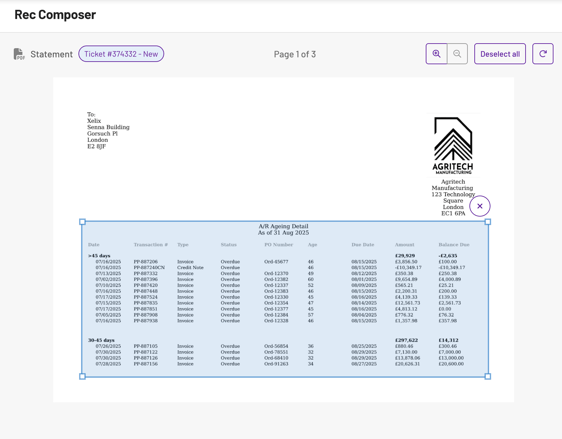
Xelix also provides the ability to rotate a statement by clicking on the rotation icon on the top right of the screen.
💡Note: you can only rotate statements in PDF format
💡Note: Once you've completed all the steps to reconcile your statement, you will have the option to edit your selected invoice numbers by removing or replacing specific characters for your feasibility. Click here to learn how to edit your invoice numbers.
1.4. Step 4: Ledger date selection
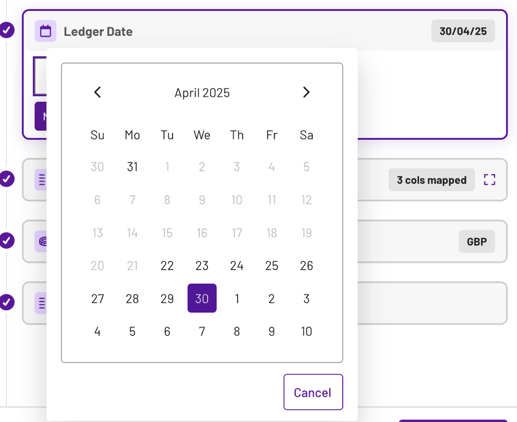
Xelix automatically detects the statement date and pre-populates the "Ledger date" field with the date from the statement. You can manually change and automate the date to suit your business needs (e.g. aligning with a pay run cycle). To do this you have to be an admin to automate your ledger date in your settings.
Xelix will use the open invoices in your systems(s) as at the ledger date you select to compare with the statement.
💡 Note: You cannot select a date for which Xelix has not received the daily file.
1.5. Step 5: Mapping columns
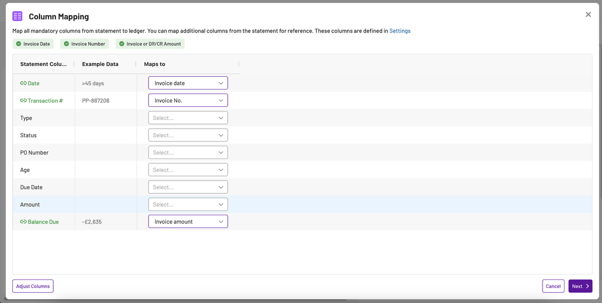
In this step, Xelix identifies and lists all the columns in the uploaded statement. You’ll see a table showing Xelix columns, statement columns, and example data.
There are three mandatory columns required for reconciliation:
- Invoice Date
- Invoice Number
- Invoice Amount
Xelix automatically matches these required columns to the statement but in the event user input is required, you can match the correct statement column to the corresponding Xelix column using the dropdown menu. For example, if your statement uses "Amount" for invoice totals, map it to ‘Invoice Amount’ in Xelix.
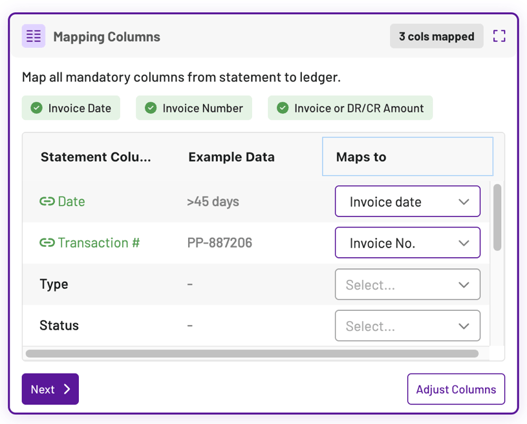
If you prefer working on a larger screen, click on the icon on the top right of this step to enter full screen mode.
You have the option to map additional columns too.
You can add custom columns to your statement in Statement settings.
💡 Note: Only an admin can do this
- Go to Statement settings.
- Under Additional statement columns, select Add column.
- Enter a column name, like Site name.
- Choose a column type:
- Text
- Number
- Date
- Select Save changes.
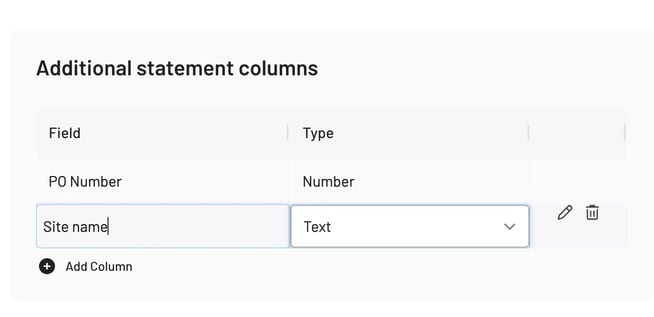
The next time you run a reconciliation, your new column will be available in Map columns. You’ll need to map it manually the first time. After that, we’ll remember your selection for future reconciliations.
You will see all the available column options you have created in settings and you can map them by choosing from the drop-down selection of columns Xelix has read on the statement.
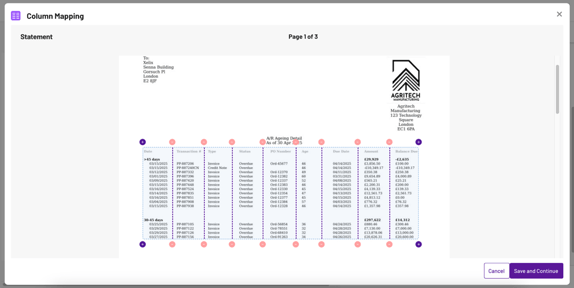
You can click on ‘Adjust Columns’ to add (+) or remove (-) dividers and move them around to ensure each column is correctly selected.
💡 Note: this feature is only available for PDF statements.
1.6. Step 6: Currency
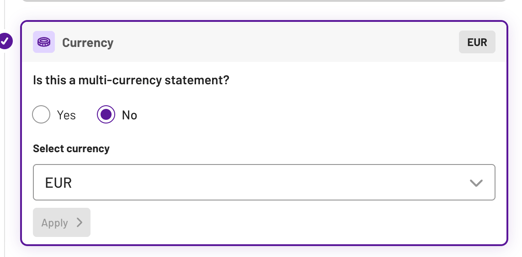
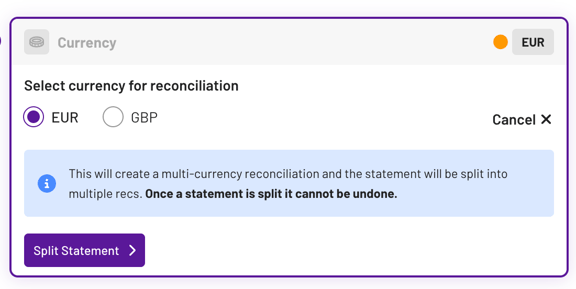
There is a multi-currency checkbox, which you can tick if the statement includes more than one currency. You’ll now see the currencies automatically identified in the statement.
💡 Note: Xelix will only list currencies found in your system and daily files.
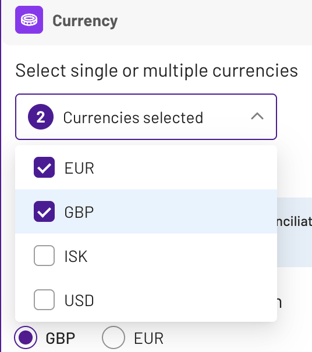
With more than one currency identified, the statement will be split, into multiple recs. In this case, there will be multiple reconciliations performed for the same vendor. To do this, click on the ‘split statement’ button on the bottom left.
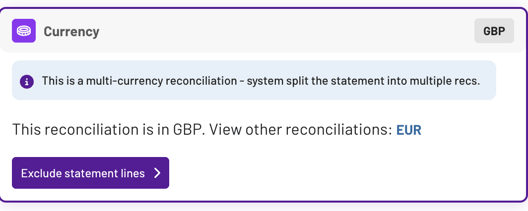
Next, you will be able to view the other reconciliation by clicking on the highlighted currency.
If you click on the ‘exclude statement lines’ button on the bottom left, you will have the option to manually include or exclude line items. In the current example, Xelix has already excluded line items identified in the other invoice, in a different currency.
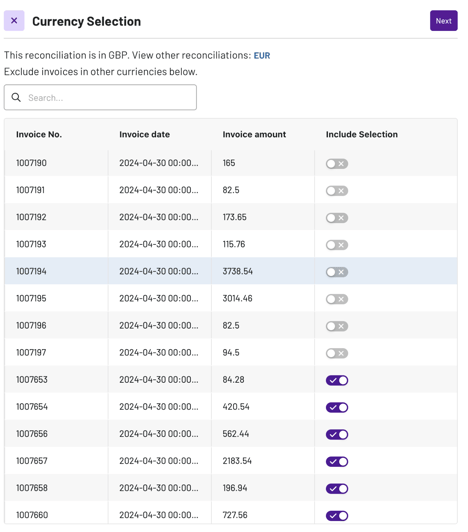
To complete this rec, after confirming the excluded statement lines, you can click on the next button on the top right of the screen to complete the rec, so you can view the rec results.
1.7. Step 7: Check rows
Please note this is not included in every workflow. Xelix will only include this final step if it recognises any rows that need reviewing before completing the rec. 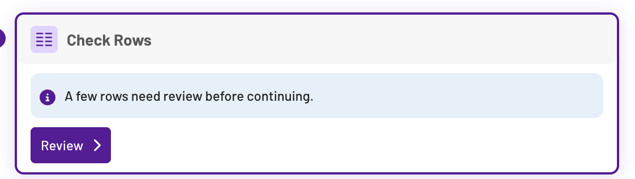
If some rows appear incorrect e.g. missing Invoice No. you’ll be given the option to review and toggle rows on or off for exclusion.
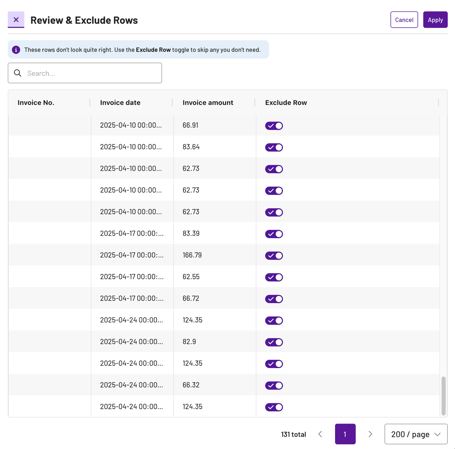
Once all steps are completed and reviewed, reconciliation will run in the background.
1.8 Reconcile a zero-balance statement
If you would like to have an audit trail for a reconciled vendor, you can achieve this by reconciling without a statement. Simply click ‘Next’ without uploading a file, and you will see the following workflow.
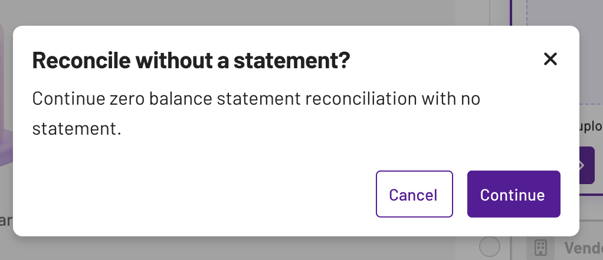
If you are reconciling a zero-balance statement, the only steps that require input are:
Vendor, Ledger Date and Currency.
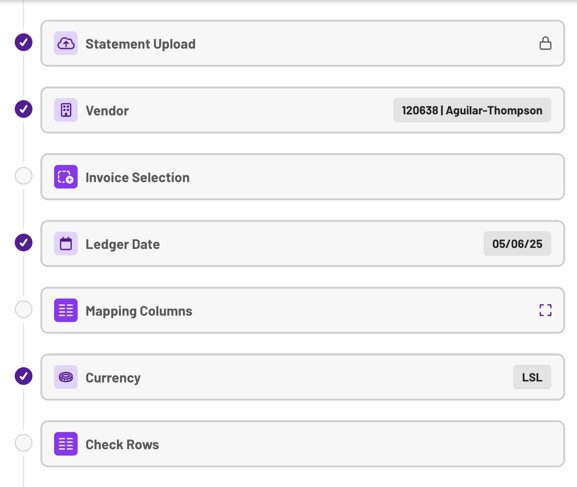
When the reconciliation is complete and you have been directed to the reconciliation results page you can still go back and edit this workflow by clicking on the button at the top left corner of the rec results page.

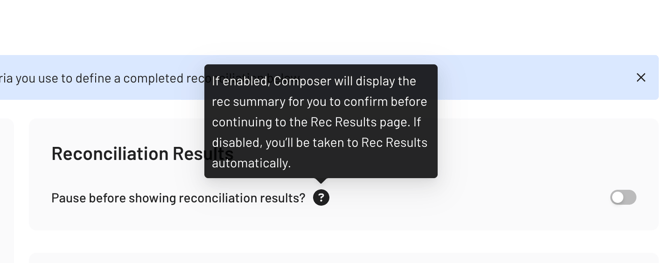
💡Note: After you've all the steps to reconcile your statement, you will have the option to review the rec info (all the steps) before you migrate to the rec results page. To enable this, contact your admin to switch on this feature on in settings under 'Reconciliation results' -> 'pause before showing reconciliation results?'
Once you've completed your reconciliation, you'll be ready to access your reconciliation results. Click here to learn how to access and interpret your summary tables - a quick overview of your results.