
Contents
- What is the All Tickets view?
- Quick filters and views
- Default columns
- Filtering and customising your view
- Bulk actions
- Exporting your view
What is the All Tickets view?
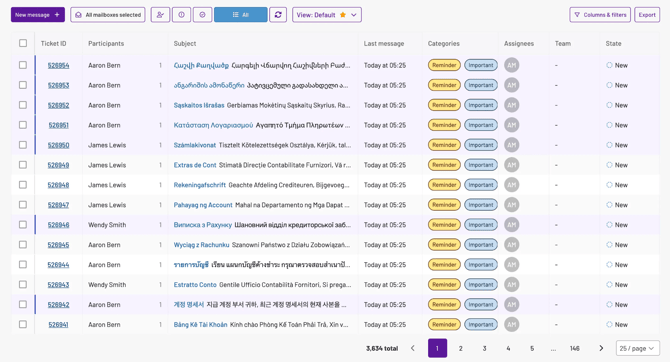
The All Tickets view displays all your Helpdesk tickets in a single, organised table. This is your central hub for monitoring ticket progress, identifying urgent items and understanding your team's workload.

Quick filters and views
Use the buttons at the top left to quickly filter your view:
- New message - create a new message manually
- All mailboxes selected – select which mailbox(es) to view tickets from
- Assigned to me – view only tickets assigned to you
- Focused tickets – view only Focused tickets (require action from you)
- No action required – view No Action Required tickets (don't need action from you)
- All – view all ticket types
- Refresh icon - refreshes the ticket list to show the latest updates
- View - update your default All Tickets view, or create a new view(s) to switch between. When you export your ‘All Tickets’ tab, it will respect any view changes you’ve made.
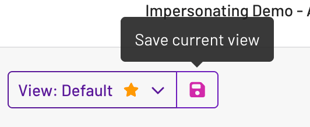
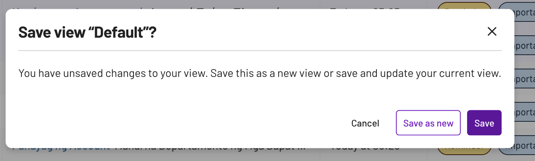
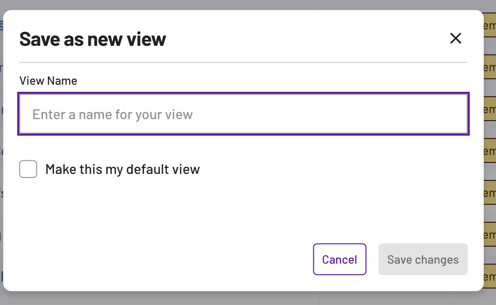
💡 Note: The tab opens on the default view. To update or save a new view, make a change e.g. adjusting the Columns & Filters, and you'll see the option to save a new view or update your default view (pink ‘save as’ icon). These changes are saved at individual user level - not for everyone.
💡 Note: All views can be edited, updated and deleted.
Default columns
💡Note: You can minimise each column manually
Ticket IDA unique identifier assigned to each ticket. You can click the ticket ID to open the full ticket details.
ParticipantsShows the customer or user involved in the ticket conversation. Multiple participants may appear if several people are engaged in the thread.
SubjectThe ticket subject line, typically pulled from the email subject or manually entered when creating a ticket.
Last messageDisplays the timestamp of the most recent message in the ticket thread. This helps you identify which tickets need attention based on response time.
CategoriesShows the category assigned to the ticket. Categories help you organise tickets by type or department. Common categories include Invoice, Reminder, Bank change and custom categories you've created.
💡 Note: You can filter by multiple categories at once to narrow down your view. Learn more about how to set up and use categories in Email categories & smart categorisation.
AssigneesIndicates which team member is responsible for the ticket.
💡 Note: Tickets can be assigned to individuals, teams you’ve created in Helpdesk settings or left unassigned.
TeamShows which team the ticket is assigned to. Teams allow you to group tickets by department or function for better organisation and workload distribution.
StateThe current status of the ticket. Tickets move through five states:
- New: freshly created tickets that haven't been actioned
- In progress: tickets currently being worked on
- On hold: tickets waiting for information or paused
- Resolved: tickets that have been addressed but not yet closed
- Complete: tickets that are fully closed
💡 Note: you can filter by state to focus on specific ticket stages. For example, filtering by "In progress" shows you all active work.
PriorityIndicates the urgency level assigned to the ticket:
- Low: non-urgent matters that can be addressed in due course
- Medium: standard priority for most tickets
- High: urgent tickets requiring immediate attention
Shows whether the ticket is meeting your service level agreement targets:
- Open: SLA timer is running
- SLA met: ticket resolved within the target time
- In breach: ticket has exceeded the SLA target
- Approaching breach: ticket is close to breaching the SLA
- No SLA: no SLA rule applies to this ticket
💡 Note: SLA status updates automatically as tickets progress. You can filter by "In breach" to quickly identify tickets that need urgent action. Read our guide on SLA Reporting to learn more about what these terms mean and how to create customisable SLAs.
SourceIdentifies how the ticket entered your system:
- External: tickets created from external customer emails
- Internal: tickets created manually by your team or through internal systems
Shows which email mailbox received the ticket. This is particularly useful if you manage multiple mailboxes for different departments or functions.
TypeCategorises tickets by their action requirement:
- No action required: informational tickets that don't need a response
- Focused: tickets requiring active attention and response
If your ticket relates to a specific vendor, this column displays the vendor name. This is particularly useful when managing supplier-related queries.
💡 Note: Learn more in How vendor identification works.
Created atThe date and time the ticket was first created in the system.
Resolved atThe date and time the ticket was marked as resolved. This field remains empty for tickets that aren't yet resolved.
Handling time in daysShows how many days the ticket has been in your system. This helps you identify long-running tickets that may need attention.
Automatically resolvedIndicates whether the ticket was resolved automatically by the system or manually by a team member.
Filtering and customising your view
Click the Columns & Filters button to access advanced filtering options. You can:
- Show or hide specific columns to focus on the information you need
- Filter by multiple criteria simultaneously (e.g., show only high-priority tickets that are in breach)
- Save custom views for different workflows
💡 Note: Your column and filter preferences need to be saved, so you can flip between different views. Only you can view your saved custom view.
Additional columns
You can customise your view by adding more columns through the Columns & Filters menu. Here are some examples of additional available columns:
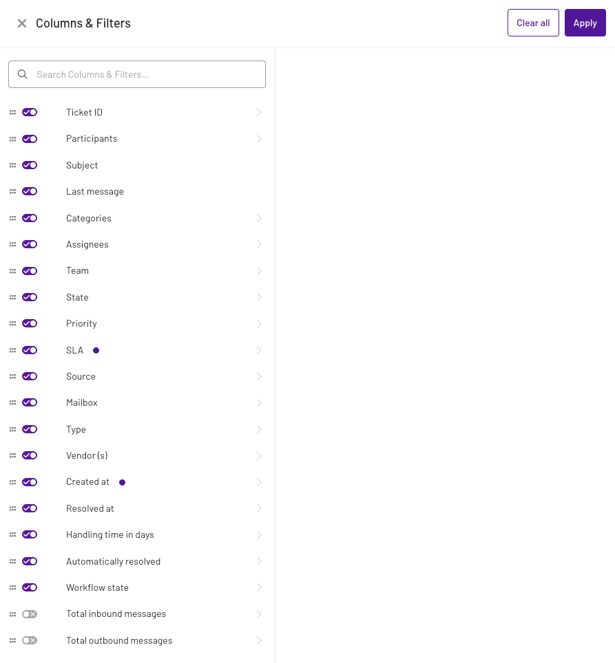
Shows the ticket's current position in your workflow: new, in progress, on hold, resolved, complete
Total inbound messagesThe number of messages received from customers on this ticket.
Total outbound messagesThe number of messages sent by your team on this ticket.
Bulk actions
Select multiple tickets using the checkboxes to perform bulk actions:
- Assign tickets to team members
- Update ticket states
- Apply categories
- Change priorities
This saves time when you need to process multiple tickets with similar characteristics.
Exporting your tickets
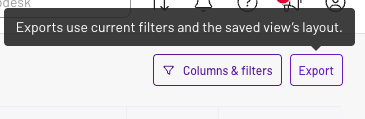
You can export and download your saved All Tickets view. This means any changes to sorting and filtering you’ve made and saved, will be reflected in the ticket export.
💡 Note: This will download as an xlsx file (Excel).