
Contents:
- What are Triggers?
- How to set up Triggers
- Trigger conditions: Xelix and Ledger columns
- Actions you can automate
Learn how to automate your reconciliation workflow with Triggers. You'll discover how to set conditions based on invoice properties, assign actions automatically and add comments without manual input. We'll walk you through creating triggers, understanding Xelix and Ledger columns and building custom actions to fit your team's needs. By the end, you'll know how to streamline repetitive tasks and focus on what matters. ⚙️
What are Triggers?
Here are some automations you can create with Triggers:
- Another missing PO number or invoice copy? → Automatically send vendors a message with your email address
- Invoice has been paid? → Let your team know by automatically leaving an internal comment
- Not fussed if the invoice dates don't match? → Automatically mark rec actions as "complete"
- Invoice is on system but not on statement? → Create a custom action label and automatically mark as "Not on statement"
How to set up Triggers
In Statements Settings, head over to the "Triggers" tab. Here you'll see a column on the left where all your triggers will exist.
💡 Note: Your triggers follow a priority - the trigger at the top of the list will take priority over the triggers below. So if you have condition overlap (e.g. you have two triggers that fire an automated vendor note), the trigger positioned higher in the list will apply. The priorities will be numbered according to position in the list so you know your priority hierarchy.
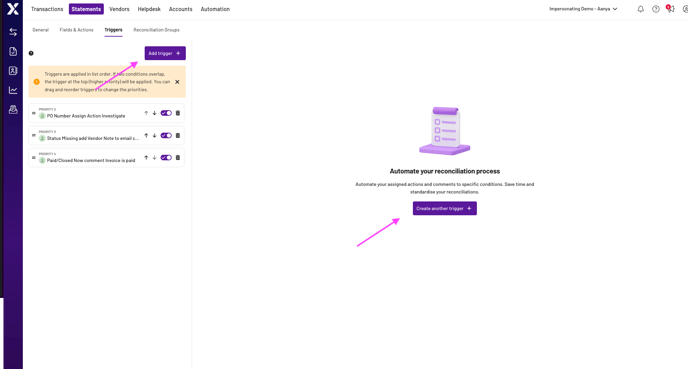
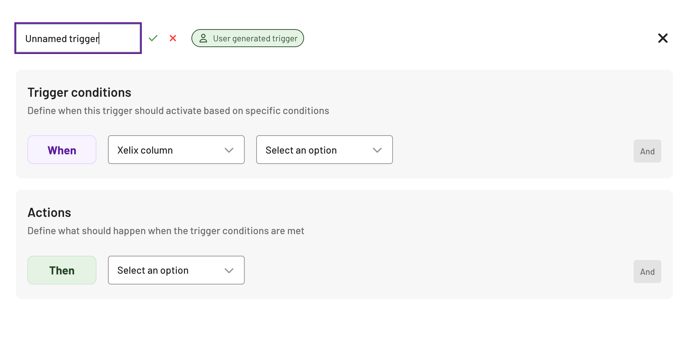
Click 'Add trigger' in the left column or 'Create another trigger' in the centre to create a trigger. Then, create a name for your trigger, this will appear in the left column.
Trigger conditions: Xelix and Ledger column
Triggers allow you to assign action or add comments for invoices that fit a particular condition, which we segment by Xelix and Ledger column.
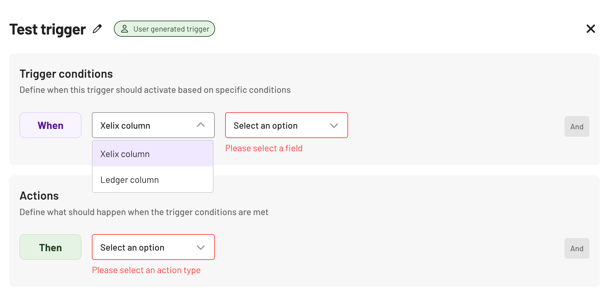
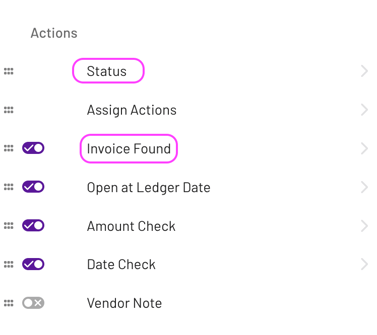
The Xelix columns are the same filters under the KPIs and Actions section of Columns and Filters in your reconciliation results page:
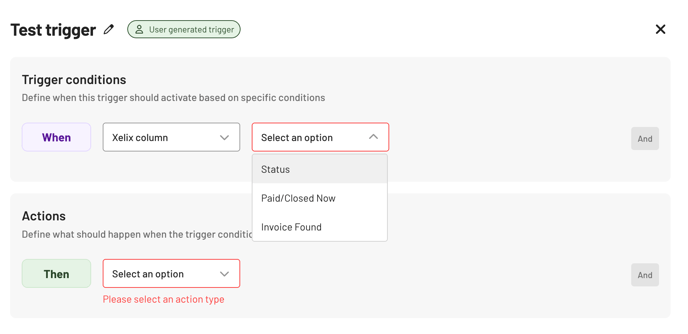
1. Status (Default)
- Amounts don’t match
- Invoice dates don’t match
- Match
- Not open on ledger
- Not on statement
- Unposted only
- Missing
💡 Note: When your status is set to ‘missing’ Xelix default is to assign ‘request copy’ - you don’t need to assign this action
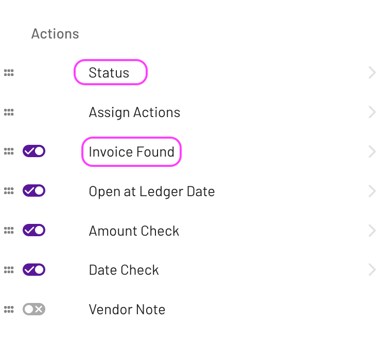
-
- Yes/No
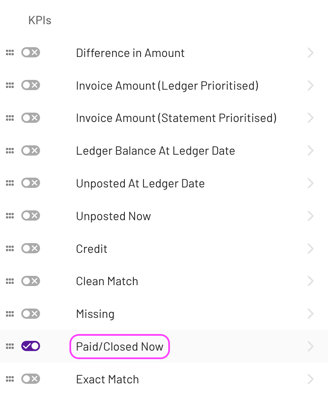
3. Invoice Found (Action)
- Yes (different vendor/currency/division/deleted/reversed)/ No
💡Note: If you’d like us to include more columns, submit your feature request via support tickets or speak to your dedicated CSM
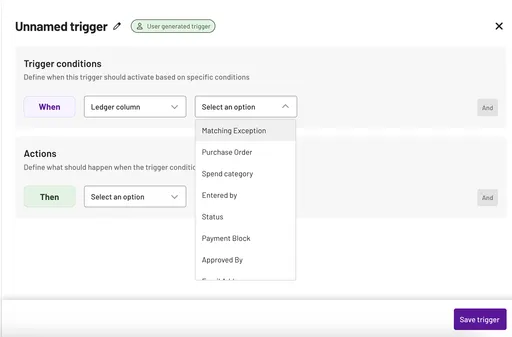
The Ledger columns are the same filters under the Ledger section of Columns and Filters in your reconciliation results page.
These can be any custom ledger columns included in your daily files e.g. Purchase Order, Matching Exception, Document type etc.
📌 Tip: Check our Rec results page: Ledger, Statement and Actions panel guide to learn more about the columns and filters available to you
Importantly, Triggers offers an ‘and’ functionality which lets you combine invoice properties. This means you can customise an action for an invoice that meets multiple Xelix and/or Ledger column conditions.
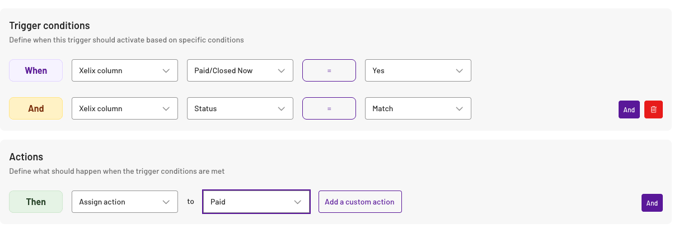
Actions you can automate
Triggers offers two actions you can automate: “Assign Action” and “Add comment”.
Assign Action:
- Investigate
- Request copy
- Unposted
- Completed
- Paid
- Your custom actions
Want to add a new action? Head over to the Fields & Actions tab next to Triggers and add your own customised actions, suited to your needs.
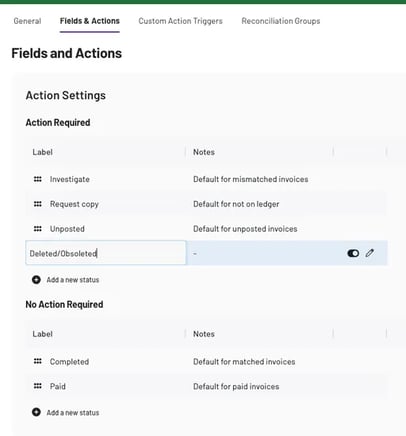
Next, when you select assign actions on Triggers, you will see the ‘add custom action’ button.

This is a popup synced to your Fields & Actions - so any custom actions made there will show up here. You also have the opportunity to add custom actions in the popup:
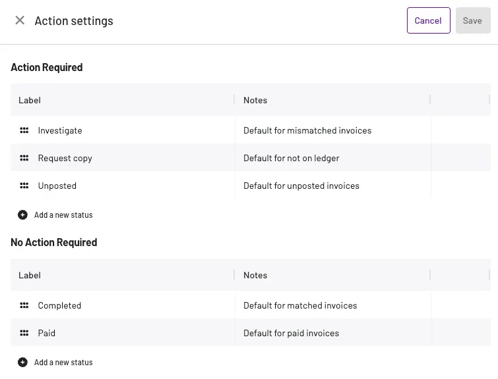
Add comment:
- Vendor note
- Internal note
When you select any of the comment actions, you will be prompted to compose the note.

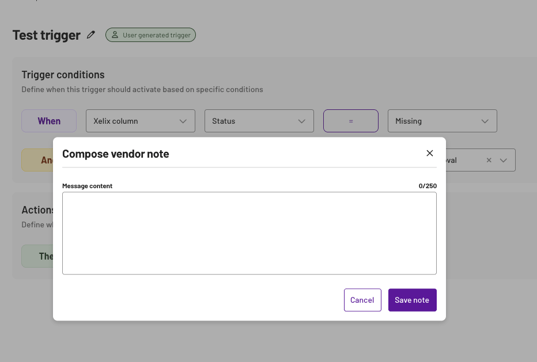
💡 Note: There's a character limit for internal and vendor notes - max 250 characters. Remember to save your notes!
Want to explore more workflow automations in Statements? Check our guide on How to set Matching Tolerance to set an acceptable amount difference between your invoices and statements.