
Contents
What are SLAs?
SLAs (service-level agreements) are time-based commitments that define how quickly your team should respond to or resolve vendor tickets.
By setting SLAs, you can track whether tickets are being handled on time, identify bottlenecks in your workflow and maintain clear expectations with your vendors about response times.
How does it work?
In Helpdesk settings, you'll find a tab labelled "SLA Policy". Here's how to set it up:
1. Activate SLA tracking by clicking the toggle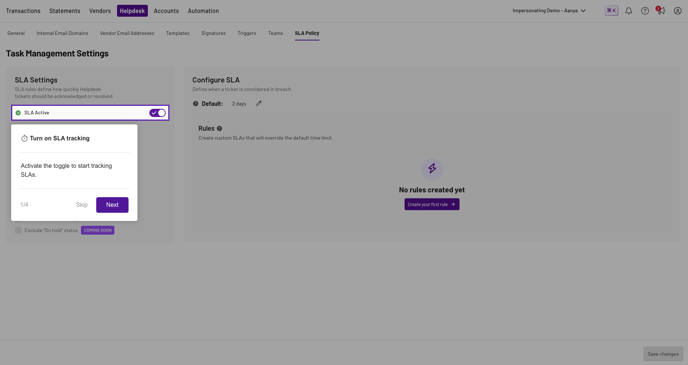
2. Set a default SLA rule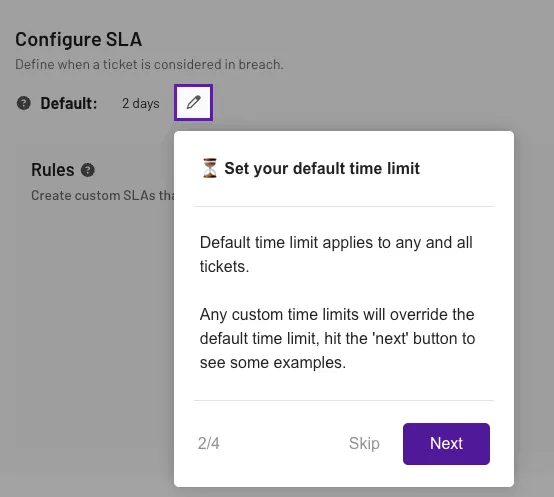
You need to set a default SLA, which applies to every ticket in your system. Xelix automatically defaults at 2 days, but you can change this to suit your needs.
💡 Note: You can't exclude specific ticket groups from SLAs
3. Set custom SLA rules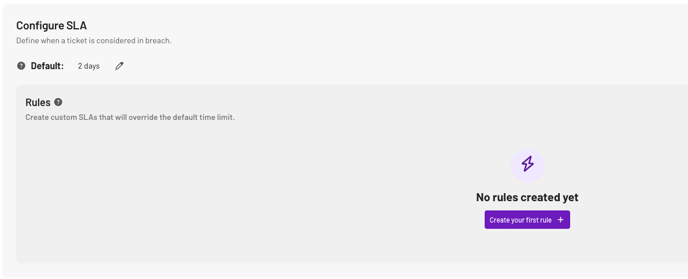
After setting a default SLA, you can further customise SLAs by ticket conditions:
- Ticket category: set specific SLAs by ticket categories e.g. bank change, reminder etc.
💡 Note: Ticket categories also include any custom categories you may have
- Ticket mailbox: set specific SLAs for tickets by mailboxes
- Ticket priority: set specific SLAs for tickets by priority (low, medium, high)
- Ticket assignee: set specific SLAs for tickets by who they're assigned to within your team
Once you set custom SLAs, any tickets that match those conditions will follow the custom SLA time limit instead of the default one.
💡 Note: Custom SLAs always take priority over your default SLA. If custom rules overlap, the shortest SLA will take priority
4. Save your SLA policies
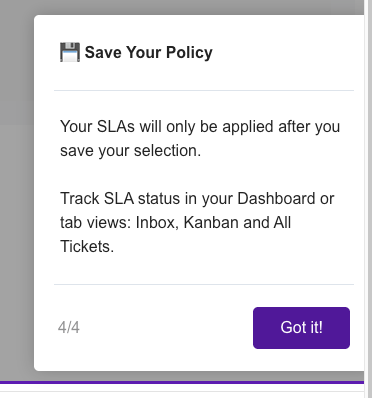
The SLAs will only apply to tickets after you've saved your settings.
How can I check SLA status?
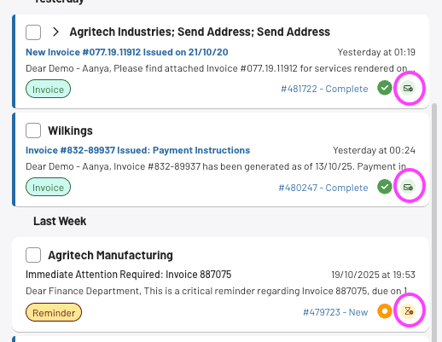
Our new SLA icons let you track SLA status and deadlines across all tab views, including two new dashboard widgets with clickthroughs.
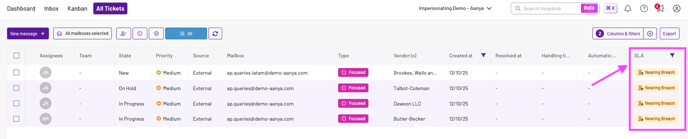
Under 'All Tickets' you'll see an SLA column enabled at the furthest right. This column shows whether the ticket SLA is:
- Open

- SLA met

- Nearing breach

- In breach

In Inbox and Kanban, you'll see the same icons displayed on the ticket board.

How can I track my SLAs?
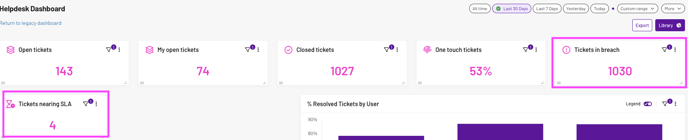
In your dashboard, you'll see a 'Tickets in Breach' widget on the right.
You get a quick glance into the amount of breached tickets, and when you click the widget you'll be taken to a filtered "all tickets" list, outlining all breached SLA tickets waiting for your investigation.
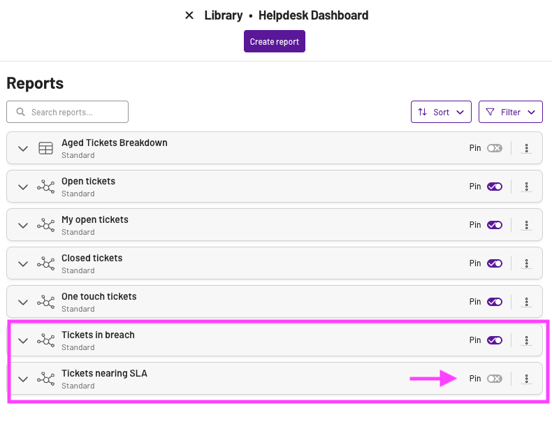
Another widget we offer is available in your chart library: Tickets nearing SLA which you can pin to your dashboard by clicking on the toggle. It shows you the amount of tickets nearing breach and when clicked, takes you to a filtered list under 'All ticket views'
These widgets have been designed so you can see which tickets are approaching their SLA deadline or already in breach, so you can prioritise urgent vendor inquiries before they become problems.
💡 Note: Click on the funnel icon on the top right of these widgets to view the amount of tickets in breach/approaching SLA within a date range
On Hold status
What if the SLA is ticking but you’re still waiting on your vendor to get back to you? You put the ticket "On Hold".
Our On Hold status pauses SLA timers, handling time and ticket aging calculations.
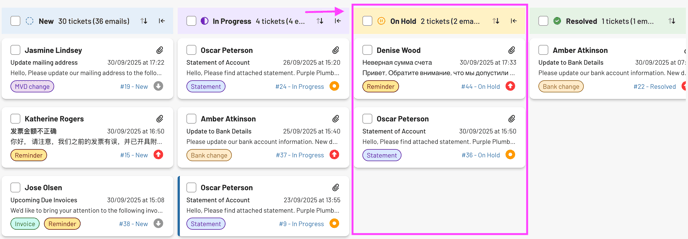
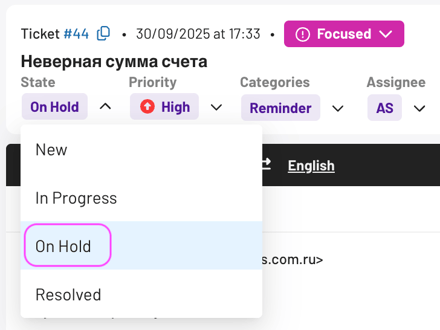
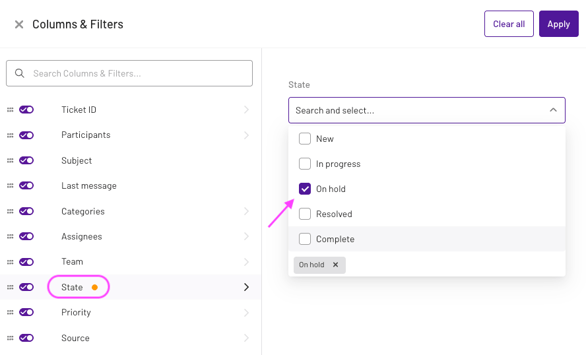
You can move a ticket to ‘On Hold’ through drag and drop (Kanban), by selecting the ticket state in dropdown menu (Inbox) or by selecting the ‘On Hold’ state in Columns & Filters (All Tickets).
💡Note: In Kanban hide the On Hold column if you want to maintain focus on tickets that need your attention
Move tickets back to 'In Progress' once the vendor replies to resume tracking.
💡Note: Currently, you have to manually move a ticket to “On Hold” however, we’re working on automations here
Enjoying SLA reporting? Do you have further suggestions? Share your feedback with your dedicated Customer Success Manager and we'll add it to our roadmap 🚀