The Duplicate Invoices table displays information about potential duplicate invoices in your account, and enables you to add or remove columns as needed. This article describes the following topics:
Column Descriptions
The Duplicate Invoices table includes a set of default columns and a number of optional ones:
Default Columns
The following columns appear by default, and can’t be removed from the table:
|
Column |
Description |
|
Assigned User |
User from your organisation assigned to investigate the duplicates. |
|
Closed Date |
Date the invoice was paid. The column is set to Open if the duplicate invoices are still pending or undergoing investigation. |
|
Duplicate Pair Classification |
Classification to assign to the duplicates:
Note: The platform learns from these selections to improve how it identifies duplicates in the future. |
|
Internal Ref. |
Internal reference number assigned by the ERP. |
|
Invoice Amount |
Amount of the invoice. |
|
Invoice Date |
Date of the invoice. |
|
Invoice No. |
Number of the invoice. |
|
Posted Date |
Date the invoice was posted to the ERP (enterprise resource planning). |
|
Recovery Status |
Recovery status assigned to the duplicates:
|
|
Risk |
Icon that represents if the invoices are likely duplicates:
|
|
Vendor No. |
Unique identifier assigned to the vendor. |
Optional Columns
You can add the following columns to the Duplicate Invoices table as desired:
|
Column |
Description |
|
Age (Days) |
Number of days since the duplicate invoice was flagged by Xelix. |
|
Approved By |
User from your organisation who approved the Duplicate Pair Classification and Recovery Status. |
|
Comment |
Comments from users in your organisation who are reviewing the duplicates. |
|
Currency |
Currency of the invoices. |
|
Description |
Description of the invoice imported from the ERP system. |
|
Division |
Division of the organisation where the invoice originates. |
|
Division Ref |
Reference number of the organisation division where the invoice originates. |
|
Document Image |
Image(s) (e.g. PDF files) for the duplicate invoices. Each available image is shown as a file icon in the cell. Click a file icon to display the image in a new browser tab. |
|
Document Type |
The category or classification of a document. Note: Listed document types are defined by the ERP system. |
|
Due Date |
Date when payment for the invoices is due. |
|
Duplicate Pair ID |
Unique number assigned by the tool to identify each duplicate pair. |
|
Duplicate Reason |
Reason assigned for the duplicate. |
|
Email Address |
Email address of the primary contact. |
|
Entered by |
User from your organisation who entered the invoice in your system. |
|
Identified Date |
Date when the tool identified the duplicate invoices. |
|
Invoice Status |
Current status of the duplicate invoice:
|
|
Last Actioned Date |
Date when a user from your organisation updated a field for the duplicates. |
|
Last Actioned By |
User from your organisation who last updated a field for the duplicate. |
|
Latest Comment |
Most recent comment in the Comment field. |
|
Open |
Investigation state:
|
|
Open Amount |
Outstanding balance for the invoice. |
|
Open Amount Base Currency |
Currency specified for the open amount. |
|
Payment Terms |
Invoice payment terms from the ERP system. |
|
PO Number |
Purchase order number. |
|
Primary Contact Name |
The main person of contact. |
|
Region |
Region where the invoice is posted. |
|
Spend Category |
Spend category where the invoice is posted. |
|
Status |
Status of the invoice. |
|
Supplier Contact |
Vendor contact. |
|
System |
The organisation’s ERP used to track their finances. |
|
Vendor |
Name of the vendor who issued the invoice. |
|
Vendor Group |
Collections of vendors categorised in the Xelix settings. To learn more, see Vendor Settings (coming soon). |
Add or Remove a Column
To add or remove a column from the Duplicate Invoices table:
- Navigate to the Duplicate Invoices tab.
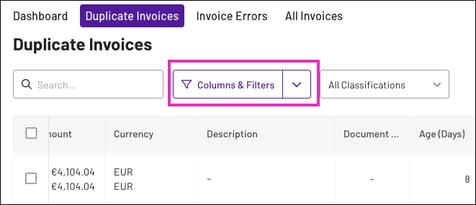
- Click Columns & Filters to open the column menu.
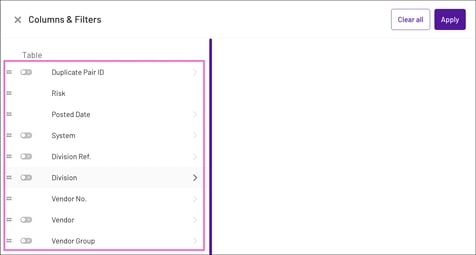
- Identify any columns you want to add or remove
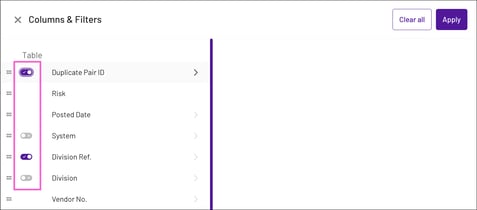
- Click the switch to the left of the column title to enable or disable the column. If the switch is purple, the column is enabled. If it’s grey, it’s disabled.
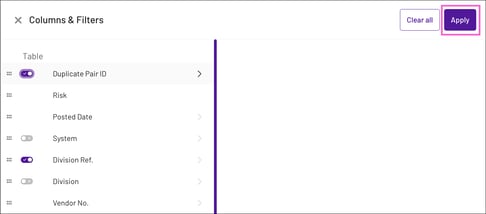
- Click Apply in the top-right corner to update the table.