The All Invoices table displays all invoices in your account. You can add or remove table columns, which include specific information about each invoice (e.g., Due Date, Status, Payment Terms, etc.). This article describes the following topics:
Column Descriptions
The All Invoices table includes a few default columns along with a number of optional ones:
Default Columns
The following columns appear by default, and can’t be removed from the table:
|
Column |
Description |
|
Invoice Amount |
Amount of the invoice. |
|
Invoice Date |
Date of the invoice. |
|
Invoice No. |
Number of the invoice. |
|
Posted Date |
Date the invoice was posted to the ERP (enterprise resource planning). |
|
Vendor No. |
Unique identifier assigned to the vendor. |
Optional Columns
You can add the following columns to the All Invoices table as desired:
|
Column |
Description |
|
Approved By |
User from your organisation who approved the Invoice Error. |
|
Closed Date |
Date when the invoice was paid. |
|
Created At |
Date the invoice was created in Xelix. |
|
Credit Note |
Whether the invoice includes a credit note/reversal:
|
|
Currency |
Currency of the invoice. |
|
Days Paid Late |
Number of days after the due date, that the invoice was paid. |
|
Description |
Description of the invoice, imported from the ERP system. |
|
Division |
Division of the organisation where the invoice originates. |
|
Division Ref. |
Reference number of the organisation division where the invoice originates. |
|
Document Image |
Image(s) (e.g., PDF files) for the invoices. Each available image is shown as a file icon in the cell. Click a file icon to display the image in a new browser tab. |
|
Document Type |
The category or classification of a document. Note: Listed document types are defined by the ERP system. |
|
Due Date |
Date when payment for the invoices is due. |
|
Email Address |
Email address of the primary contact. |
|
Entered by |
User from your organisation who entered the invoice in your system. |
|
Excluded From Payment KPIs |
Whether the invoice is excluded from KPIs (Key Performance Indicators):
|
|
Invoice Amount Base Currency |
Base currency for the invoice amount. |
|
Internal Ref. |
Internal reference number assigned by the ERP. |
|
Late |
Whether the invoice was paid late:
|
|
Net Amount |
Net invoice amount, excluding sales tax. |
|
Net Amount Base Currency |
Net amount of the invoice in the base currency. |
|
Open |
Investigation state:
|
|
Open Amount |
Outstanding balance for the invoice. |
|
Open Amount Base Currency |
Open amount of the invoice in base currency. |
|
Paid Amount |
Amount paid for the invoice. |
|
Paid Amount Base Currency |
Amount paid in base currency. |
|
Payment Days |
Number of days between when the invoice was received and when the vendor received the funds. To learn more about changing assumptions around the receipt and payment date, see How to use Payment Performance. |
|
Payment Received Date |
Date when payment was received. |
|
Payment Terms |
Payment terms of the invoice from the ERP system. |
|
PO Number |
Purchase order number. |
|
Primary Contact Name |
The main person of contact. |
|
Receipt Date |
Date the invoice was receipted by your company. |
|
Sales Tax |
Sales tax of the invoice. |
|
Sales Tax Base Currency |
Currency for the Sales Tax. |
|
Spend category |
Spend category where the invoice is posted. |
|
Status |
Status of the invoice. |
|
Supplier Contact |
Primary vendor contact. |
|
System |
The organisation’s ERP used to track their finances. |
|
Vendor |
Name of the vendor who issued the invoice. |
|
Vendor Group |
Collections of vendors categorised in the Xelix settings. To learn more, see Vendor Settings (coming soon). |
Add or Remove a Column
To add or remove a column from the All Invoices table:
- Navigate to the All Invoices tab.
- Click Columns & Filters to open the column menu.
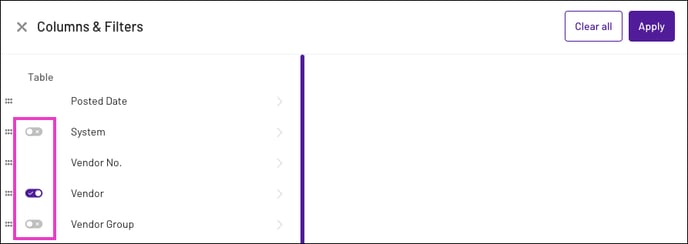
- To the left of each column you want to add or remove, click the switch to enable or disable the column. If the switch is purple, the column is enabled. If it’s grey, it’s disabled.
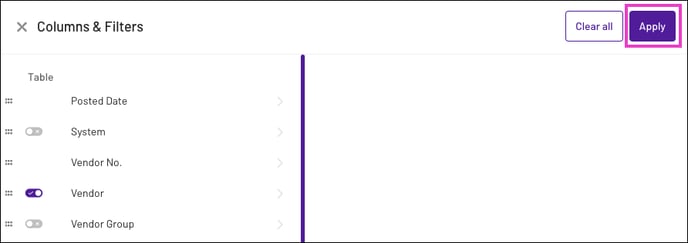
- Click Apply in the top-right corner to update the table.